Saturday 15 March 2014

The Miro's Head Part 1

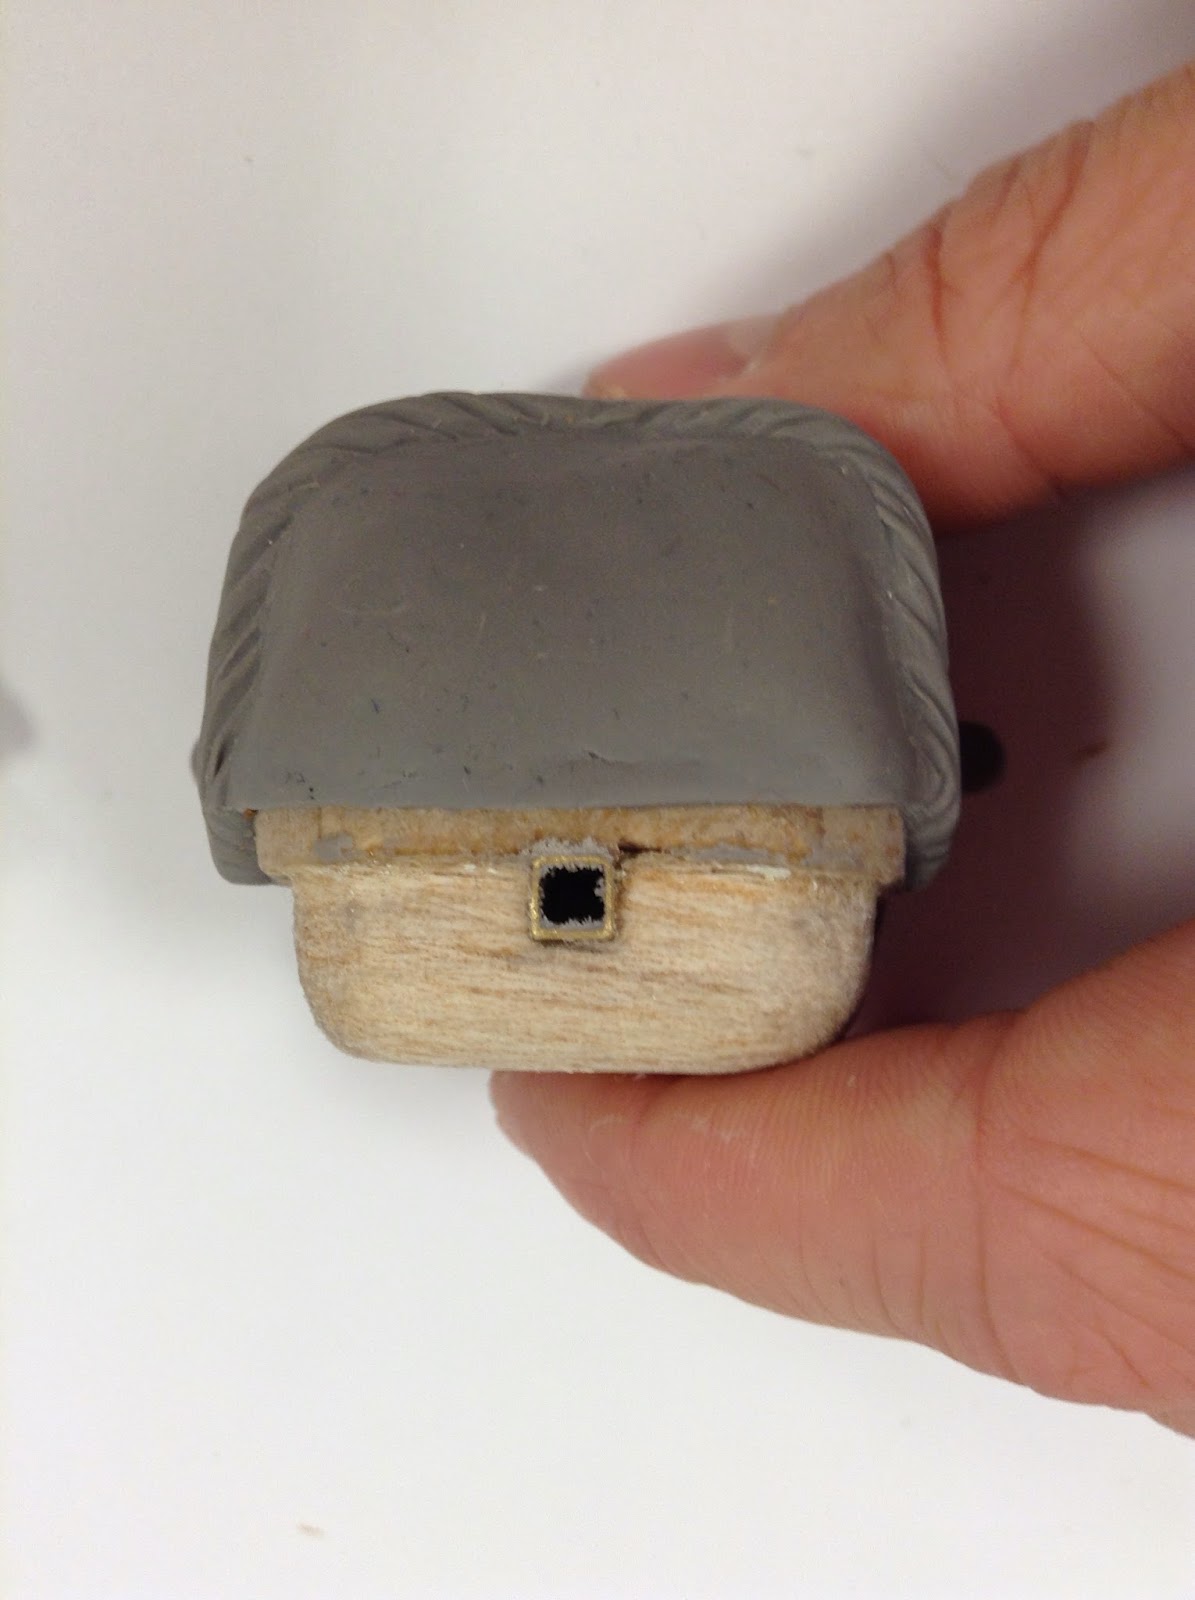
Hey guys, firstly it's my little sisters birthday today, so I would just like to wish Rosie a happy birthday. PARDY HARD! Now onto The Miro's head, which unlike Theodor's was a lot less complicated. I started off by bulking out the core with balsa wood. Starting off with two sections (illustrated below) which were them glue together with a piece of K&S down the middle.


Once I had this middle section, I built up the remainder of the head with balsa wood.


I then sanded down the head, I wish I took more photo's as I sanded down the head a lot more than the photo below suggests. But hey you know how it is when your in the zone.


I then sculpted on top of this balsa wood core, using Super Sculpey Firm. I used pins and small sculpey circles to make his little antenna on the side of his head. The antenna were glue in place using super glue.


Click back soon to see the finished head, and also his (could be a her...) little alien body.

Thursday 13 March 2014

Theodor's Head Part 1

Hey everyone! I finished the puppet of Theodor today! only have The Miro's body to finish sculpting, so as you can probably guess I've got loads to post about. So lets crack on! The core of Theodor's head was sculpted from balsa wood, with individual pieces being glue together with epoxy glue. I had a K&S slot inside the head so it could be attached and detached form the body, and also a piece of K&S at the front so I could attach the eye sockets.


The eye sockets were sculpted in Super Sculpey and a piece of K&S of the same size as the one found on the front of the face was run down the back of the sculpt. A plaster mould was then cast and a silicon duplicate was made.


Once I had the eye sockets the front of the face was added in balsa wood. Ears made from balsa wood were also attached using wire and epoxy glue to keep them in place.


Theodor's head before any sculpting had been done on top.


I Sculpted the back of Theodor's head using Super Sculpey Firm, I sculpted up until the side burns at first, as this is where I decided to put the split line. This was so the the face could be detached.


I then, applied a thin layer of Vaseline on to where the face would sit and worked Milliput on top.


Theodor's face was sculpted on top of the Milliput using super Sculpey Firm. When baking the sculpt I was constantly removing it from the oven and returning it to the head to make sure that it was a tight fit.


This was Theodor's final head before it was painted:


The hat will hide the split line on the top of Theodor's head.

Wednesday 12 March 2014

Theodor's Clothes

To begin making Theodor's clothes, I wrapped cling film around his armature and then wrapped masking tape on top.


Seem lines were then drawn out onto the masking tape; cutting along the seam lines then produced my clothes patterns. I used the same clothes pattern used on the shirt to produce Theodor's waist coat.


These patterns were then traced around onto my chosen fabrics and cut out, making sure to leave excess fabric around the edges. To get the jeans the colour I wanted, I had to dye the denim with lavender Dylon Hand Fabric Dye.


I then sewed the pieces of fabric together to produce the various items of clothing for Theodor. Starting with the shirt:


To make the shirts collar, I used a piece of paper which the fabric was then glued to using super glue. The collar was then kept in place around Theodor's neck using a small pin. Pins were also used to keep the front of the shirt in place. This also allows me to remove the pins and the shirt if I need to get to a joint so it can be tightened.


The waist coat was made using the same clothes patterns used on the shirt. I used two different fabrics on the front and back and attempted to sew a hanky into his front pocket (This will be done again at a later date.)


 The jeans were by far the trickiest item of clothing I had to make for Theodor, but after a long day sewing I got there.  


Belt loops were sewn on so I could run a silicon belt around Theodor's waist.


The jeans were kept in place using pins similar to how they were used on the shirt. The pins were then hidden by the belt I made. 


To help tuck the jeans into the boots, I tied elastic bands around the bottom of the legs and then worked the boots on.


I cast the belt along with Theodor's eyebrows and moustache. They were sculpted using Super Sculpey Firm, the sculpts were then laid up inside a foam board box and a plaster mould was taken.


Once I had my mould, I painted in grey silicon for the belt buckle. When this had dried, I painted in a layer of purple silicon so that risk of air bubbles would be reduced. Finally after this layer was dry, I laid a piece of wire through the middle of the belt and filled the mould with purple silicon.


The belt was then fed through the belt loops, with the wire inside helping to keep its shape.


And then hey presto!!! Theodor is all dressed up for his big film debut! Minus a head but...


I found this cool little cowboys hat to go his head when its done. I just need to get rid of the flames, and some of the sparkly bits.